Event Management
Step By Step Explanation For The Odoo Events Module

This is Main Dashboard View. It displays various stages for the Events in the Kanban view.
You can see this main Dashboard in different interface like Kanban, Calendar, List, Pivot, and Graphical views.
You can create a new stage for the events by clicking on the (+) Add Column option.Gear button (Settings Menu)
- You can “FOLD” the stages
- You can add the Description for each stage by clicking on the Gear button (settings menu) – “Edit Stage”
- You can delete the Stage, archive and unachieved.
By clicking on the + symbol in the stage – you can directly create the event on that stage!
For Sorting you can use the “Filters” and “Group by” option
You can create a new Event by clicking on the Create button
The preview of the event in the Kanban view will show the
Title of the event,
Location,
Date, and time
Expected number of attendees.
The clock icon given on each event can be used to “schedule activities”.
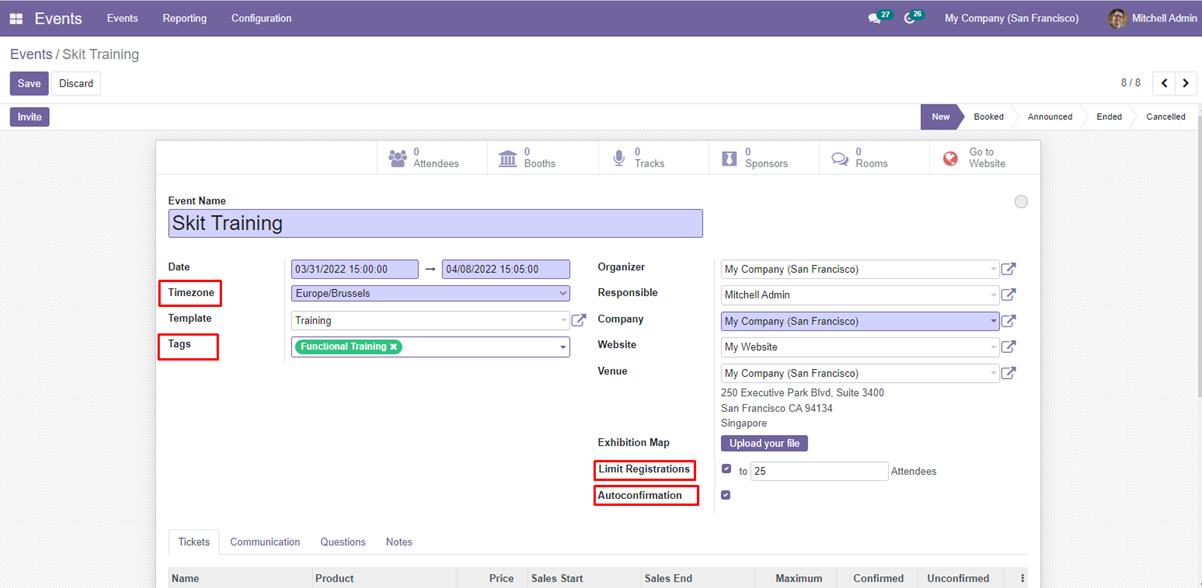
In the new event creation window, you can mention the Event Name in the given field.
Enter the starting & ending date, Time zone, Event Template, Organizer, Responsible, Company, and Website to publish the event, Venue of the event, and upload the Exhibition Map in the respective fields.
Limit Registration: You can set the maximum attendees for your event.
If the registrations reached the entered value, new registrations will be not done after that.
Auto Confirmation: By enabling this option, Registrations will automatically be confirmed once registration was done successfully.
Under the Tickets tab, you can add tickets for the event using the ‘Add a Line’ button.
You can add the Ticket and set it for Free (by not entering the amount for that ticket) and add ticket sale start date and end date
You can set the maximum number of tickets (if you enabled the “Limit Registrations” option)
You can also add the type of Ticket by clicking “Add Line” button and there you can set the cost of the ticket and maximum count, start date and end date.
In Question tab – You can set the Question you need to ask while registration.
In the image you can see the Smart button “Go to Wesite” which is in red colour resembles that this Event is not Published in the Website.
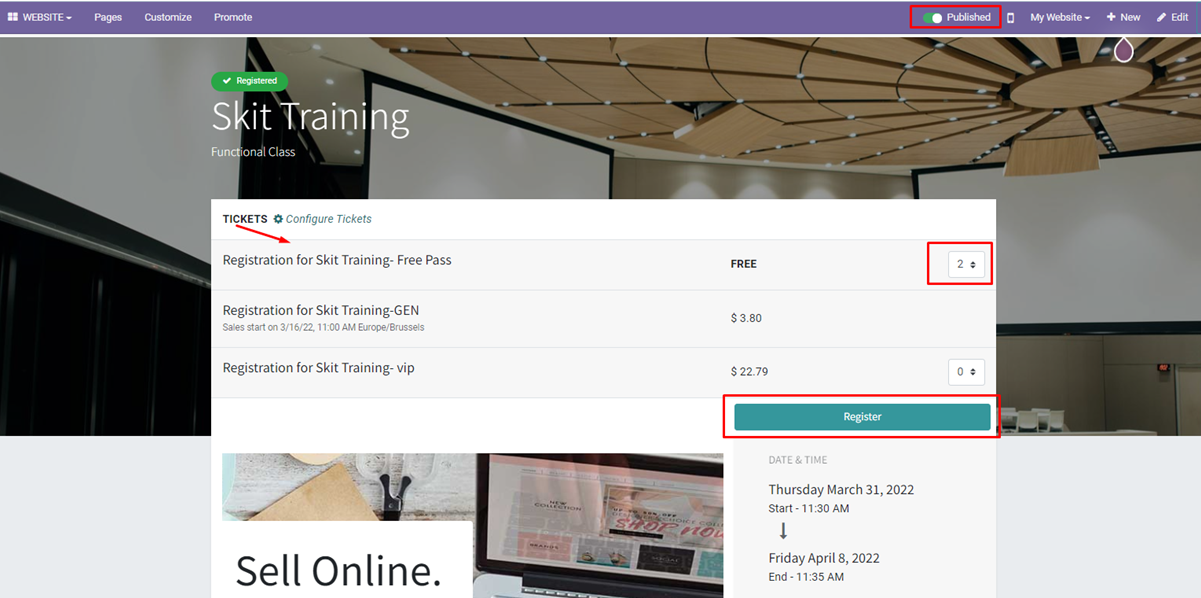
You can click on that “Go to Website” and Publish that event in your Website as you can see the “Green” Indicator in the “Published button”.
There you can see the Tickets (all types)
User can set the number of tickets and register their seats for the Event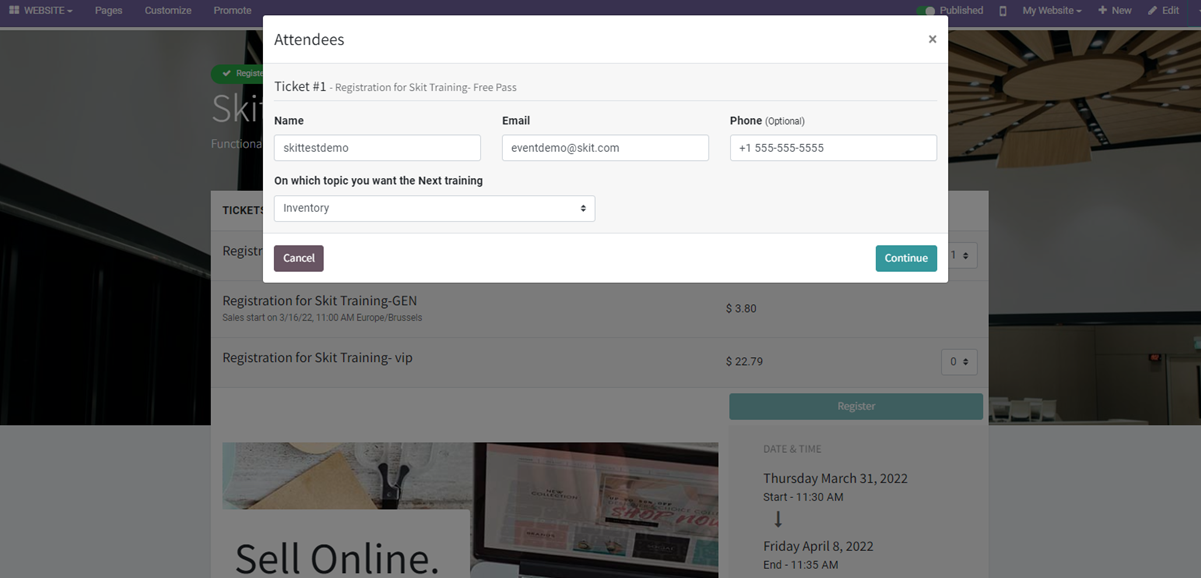
By the entering the Basic Details here,
you can register the Event
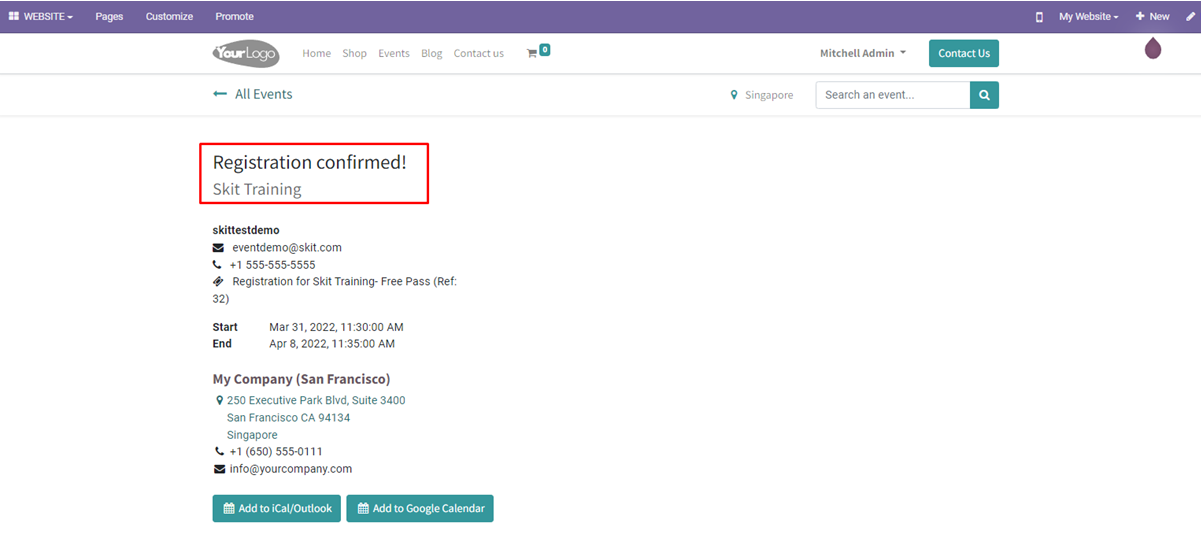
After registration, you get the Confirmation text along with the basic details of the Event start date, end date, event Location and Event organizer name, Company address, and Contact number
You can also add this Event reminder in the Google Calendar
This is how it looks like!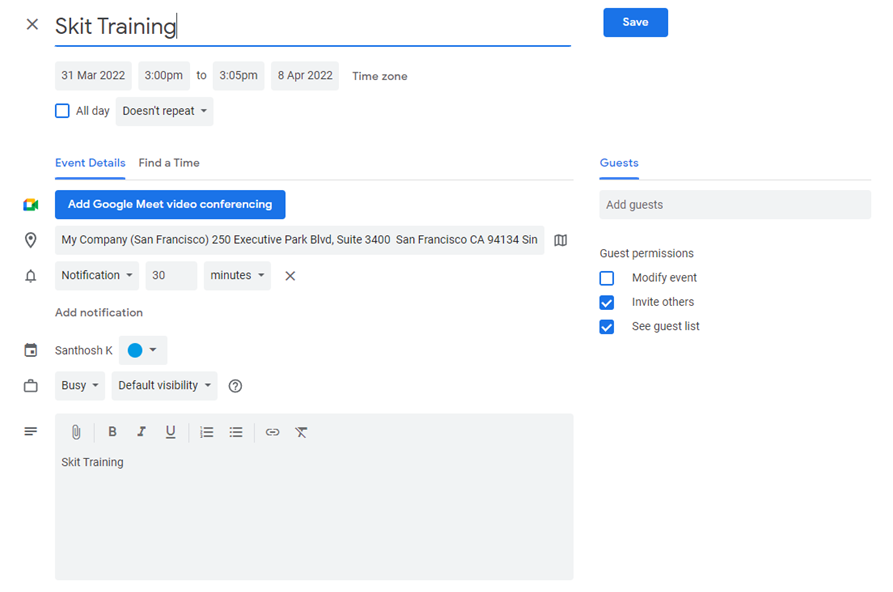
This is the Main Dashboard there you
can see that For Skit Training 3 Attendees so far
You can check the attendee details in the backend
Event Communication with the Users
In odoo Default options were given for communication
1. Mail Event Registration – 1 immediately – after registration
This will send the mail to the users immediately after the successful registration. You can also edit this “Event Registration” template.
You can also add the communication as per you need
Here is a special feature that,
For example let me set the Interval 10 days before the event
If the User opened the email 5 days before the event. The mail will tell that
“We are Excited to remind you that the event is starting in 5 days”
You can add the communication medium – via SMS too (to remind SMS will consume Some Credits)
As you can see the number 3 in the “Sent’ option – As 3 Event Registration mail has already sent to the users who have registered already!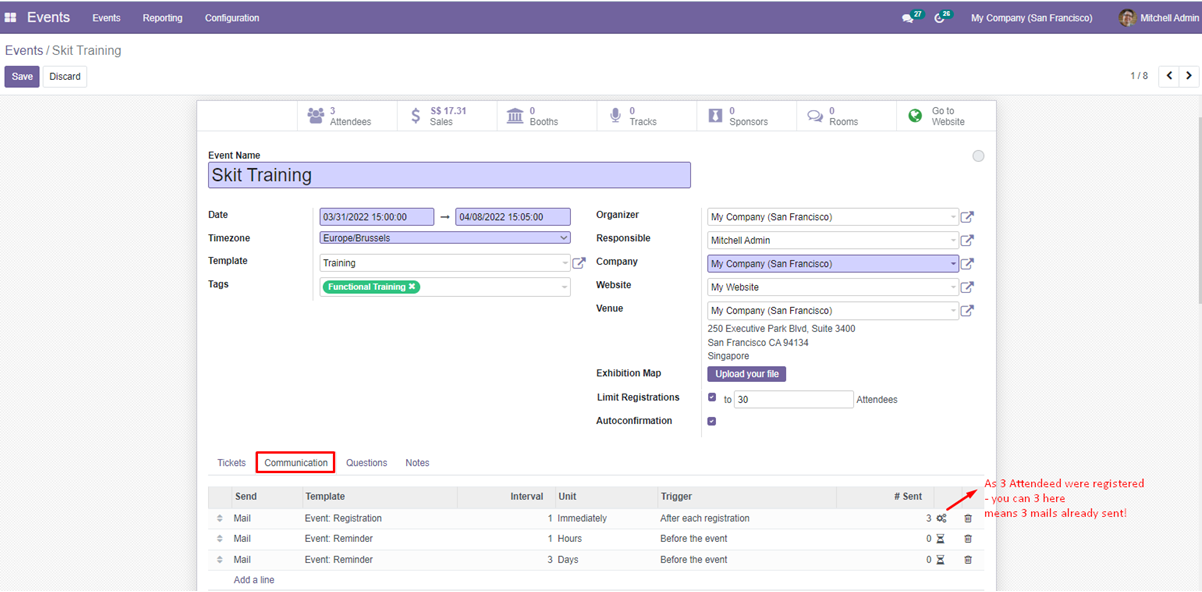
You can configure your questions which
you want to ask during the Registration!
By clicking on the Questions tab you can create the “selection type questions” and “Test input questions”
After adding the question, click on the Save & Close button.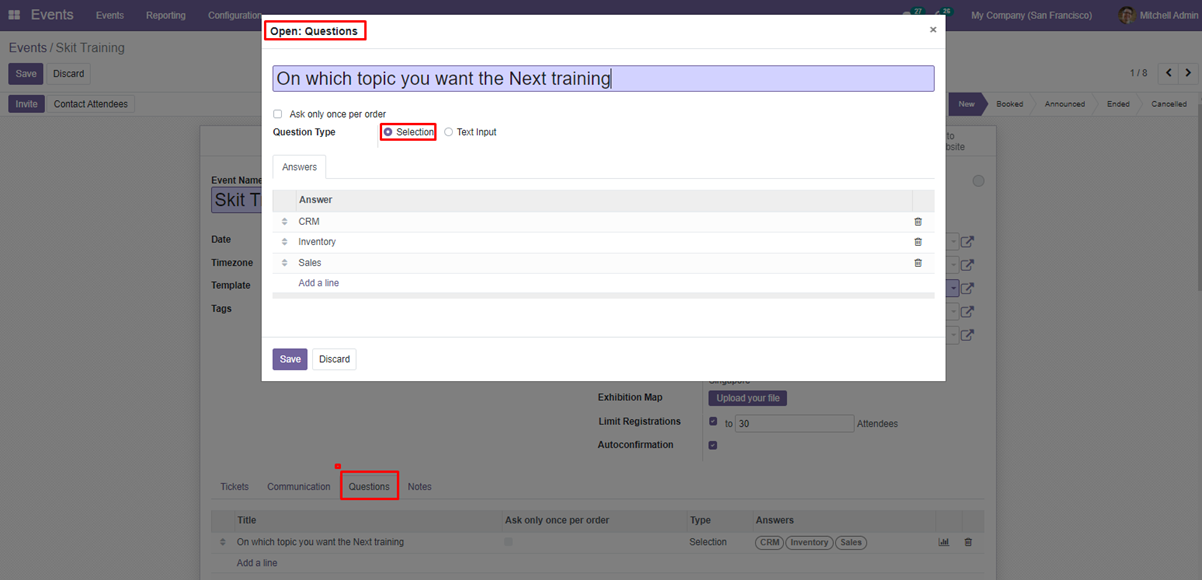

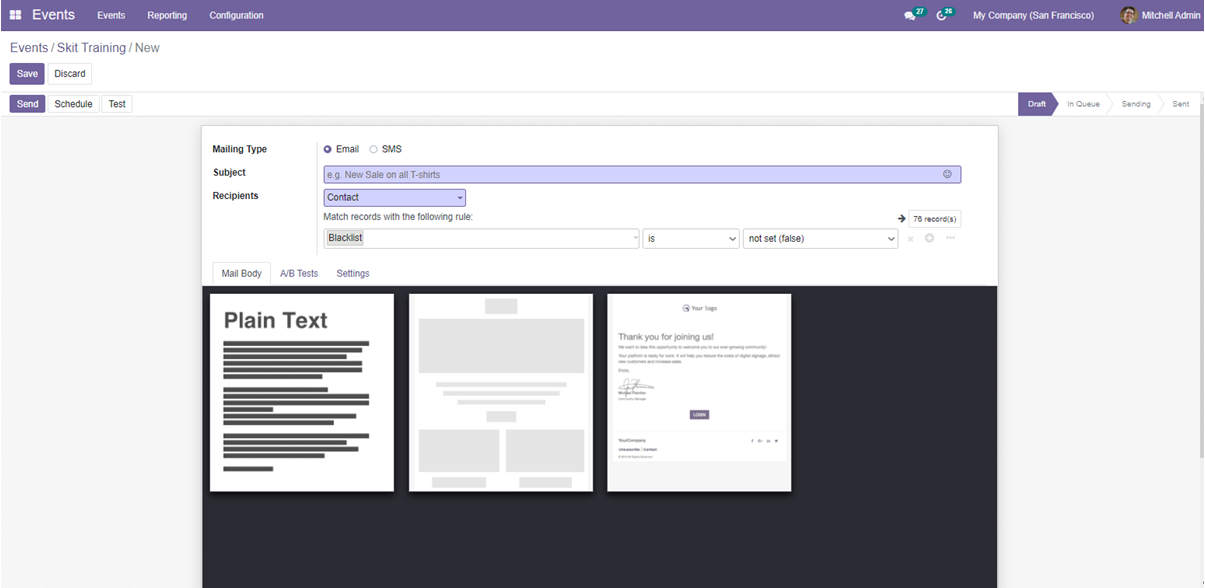
You can create, schedule and send the
marketing mails!
(Please check our Email Marketing module demo videos
to know more about that)
While activating these options, you will get the respective buttons on your event page. The Community Chat Room option will help you to create virtual conference rooms for attendees.
The online Exhibitors option will display sponsors and exhibitors on your event pages.
The Booth Management option will help you to create booths and manage their reservations.
By activating this option, You will get these smart buttons on your Event page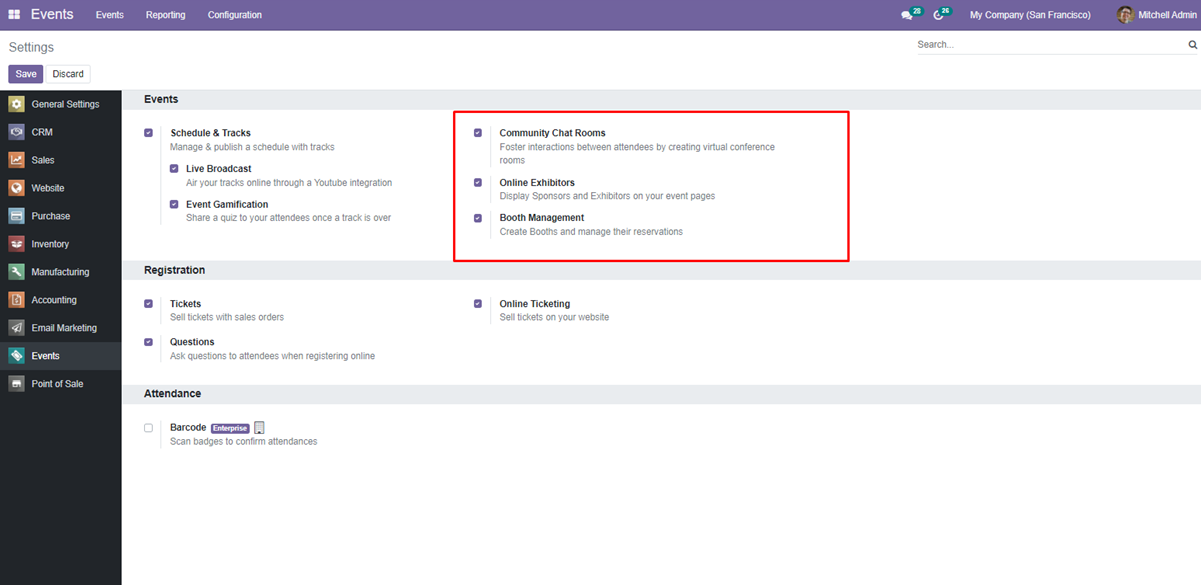
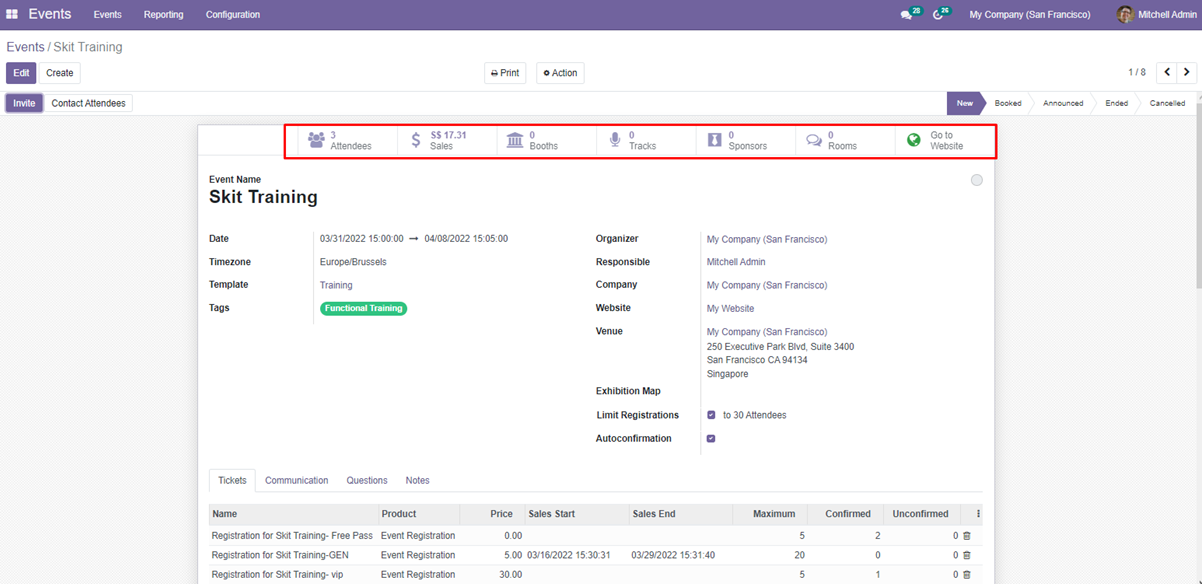
The Booths button will show the list of booths that you rent for your event.
The Tracks define your event schedule. It can be talks, workshops, or any similar activity. In Sponsors button you can see the details of your event sponsors.
The Chat Rooms option allows your event attendees to meet up and chat on different topics.
The Contact Attendees – This will help you to contact your attendees via Email and SMS
This is how we create new events in the Odoo Events module.
Event Tracks
Now, let’s take a look at the Event Tracks menu in this module.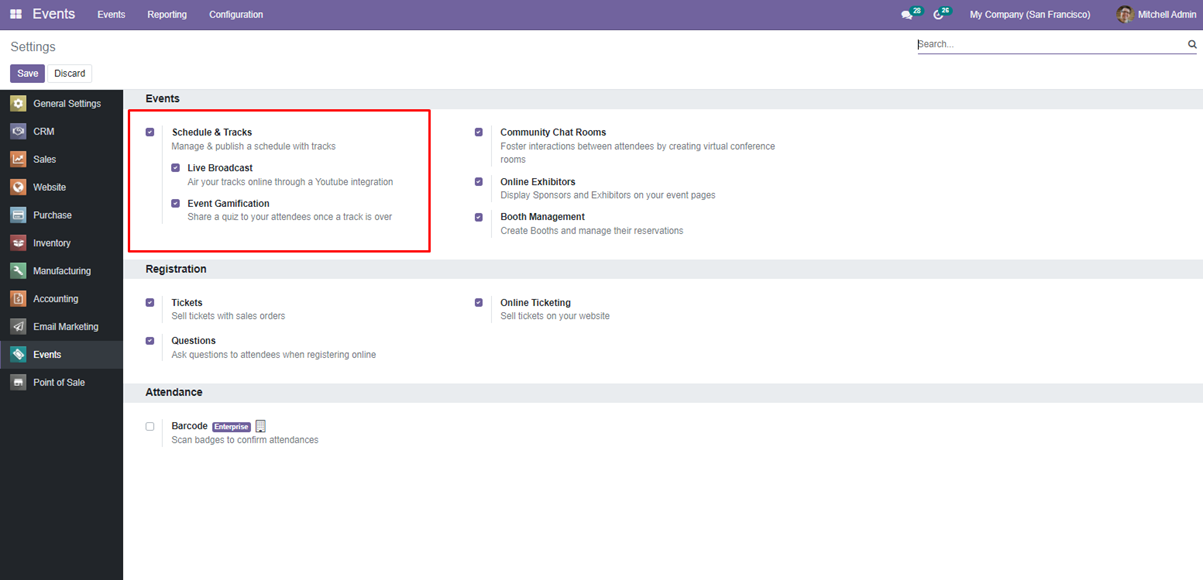
By enabling this option you can Manage & Publish a schedule with tracks
Live broadcast – Air your tracks online through a YouTube Integration
Event Gamification - Share a quiz to your attendees once a track is over
Configuration
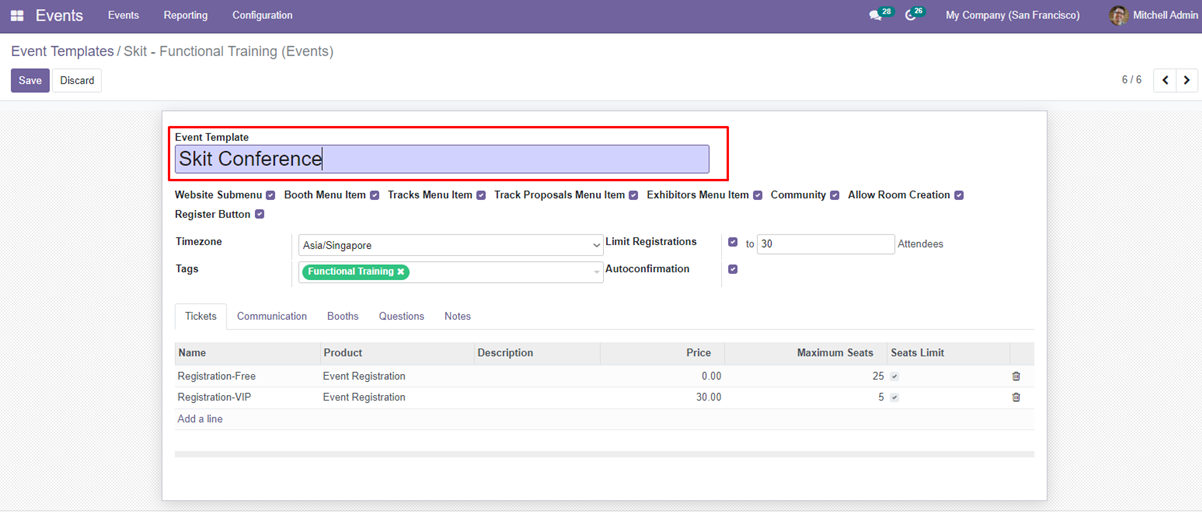
Event Template
These were the default templates in odoo you can edit and use that.
You can also create your new template as per your event requirement using the “create” button.
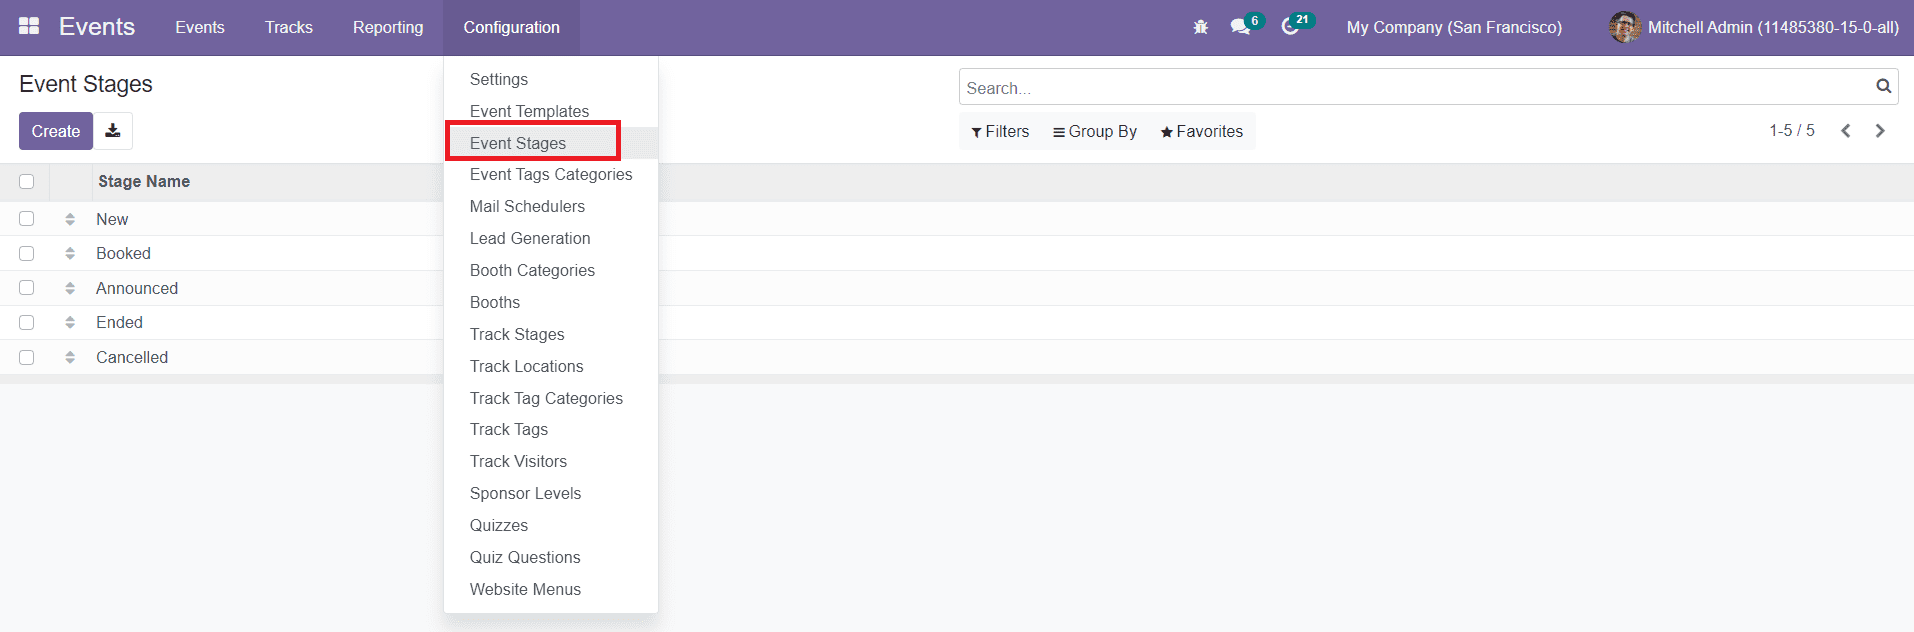
Event Stages
You can create different stages for events according to your Events Flow.
You can create and manage Event stages under the Configuration menu of the Events module.
There are default stages given in the odoo. You can create your own stage by clicking on the “Create” button.
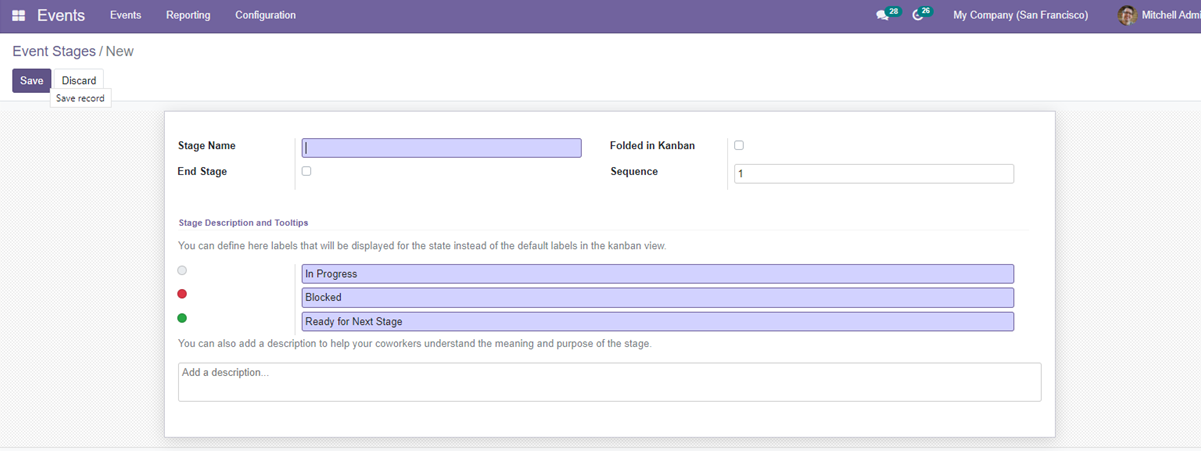
Give the name for this stage
End stage: By enabling this option – Events will be automatically moved to this stage once completed
Folded in Kanban : By enabling this option – this stage will be Folded in the Kanban view
In the Stage Description and Tooltips field, you can define the labels that will be displayed for the state instead of the default labels in the kanban view.
In Stage Description and Tooltips option
You can define labels that will be displayed for the state instead of the default labels in the Kanban view.
In “Add a description”
You can add a description to help your co-workers understand the meaning and purpose of the stage
Complete all the field and click save button – so that this stage will be shown in the main dashboard.
Event Tag Categories
You can create different categories for your Event TAG\
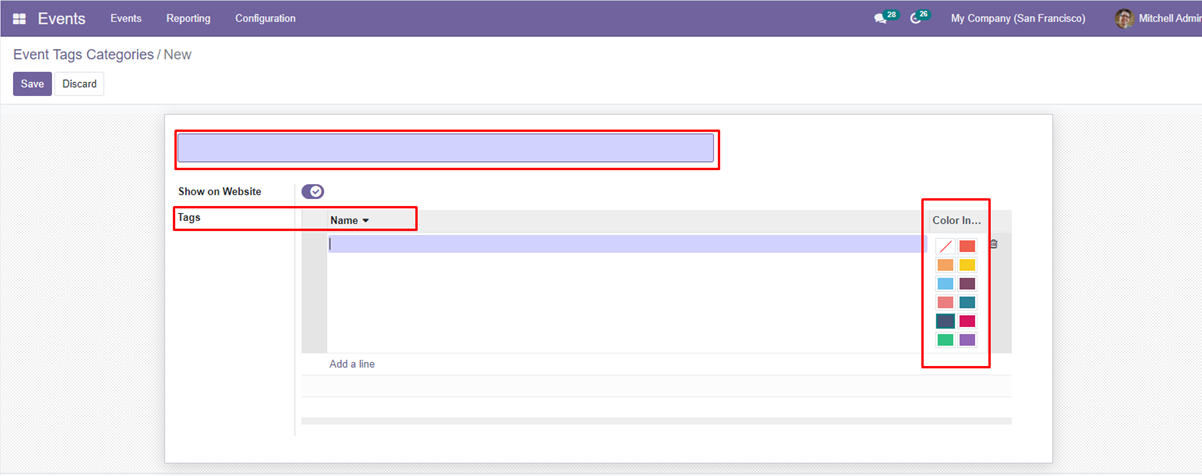
In the new window,
you can enter
the name of the event tag category and activate the “Show on Website” option to
show this tag category on the website.
Using the ‘Add a Line’ button you can add Tags and select colors to the category. Click on the Save button to save your Event Tag Category.
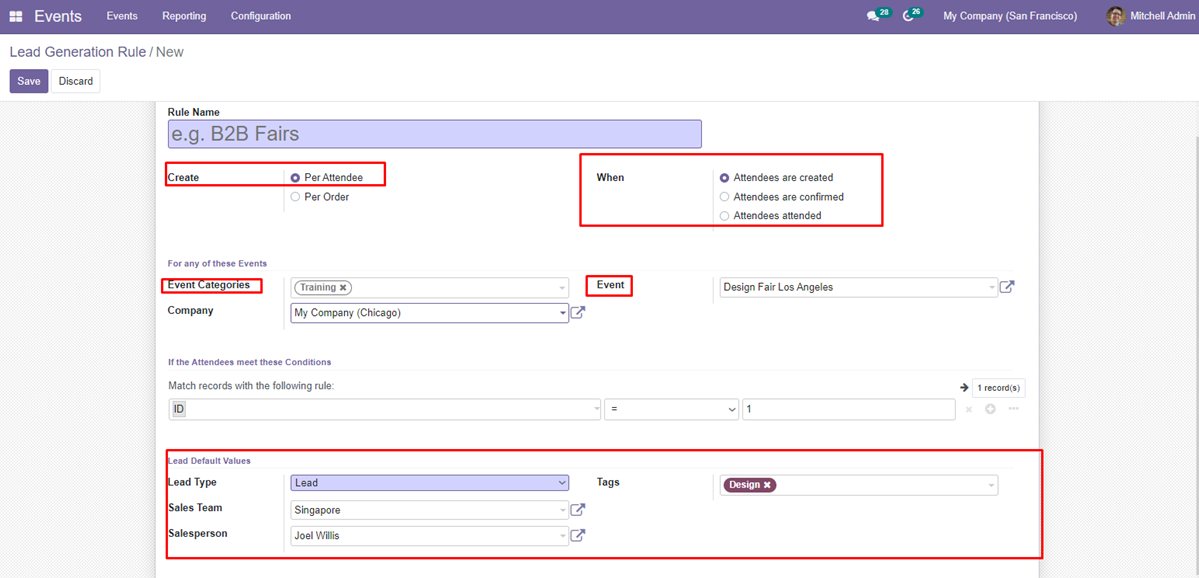
You can generate the leads from the details of attendees collected from the Events module.
You can create a rule for the lead Generation under the Configuration menu of the module.
It is easy to generate leads from the details of attendees collected from the Events module. You can configure rules for the lead generation under the Configuration menu of the module.
In
new rule creation window
Booth Categories
When conducting an event, companies will rent booths to outside business firms to promote their product and service at the time of the event. In the Odoo Events module, you can categorize the booth into different categories.
You will get access to the platform from the Configuration menu of the module.
As you can see in the image above, the window shows different categories of the booth along with its price.
You can create a new booth category by clicking on the Create button.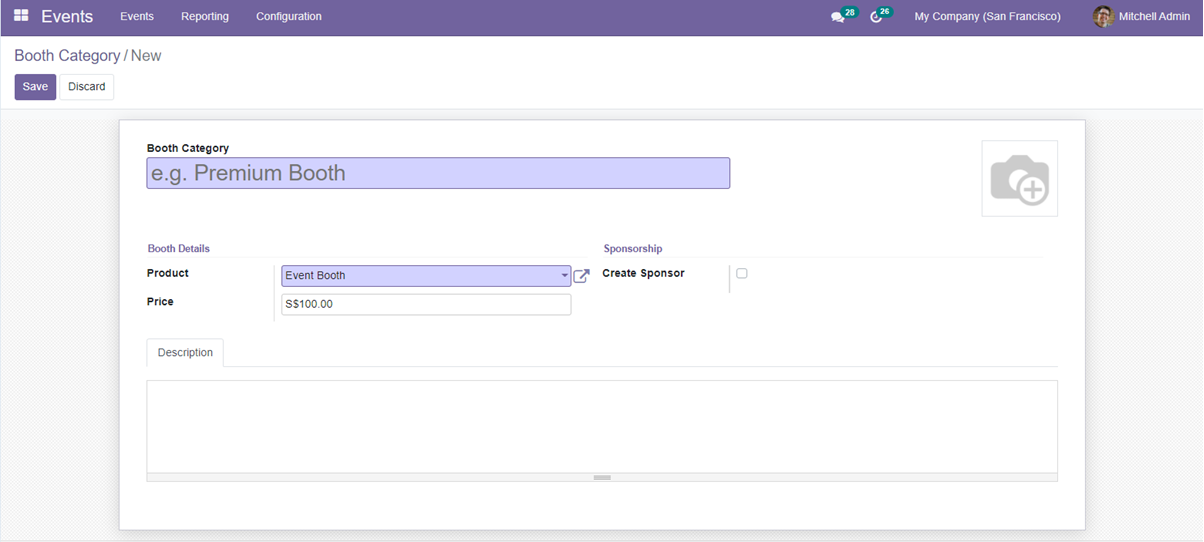
After clicking the create button, Enter the name of the Booth Category.
You can configure Event Booth as a product and set its price in the Sales module. By doing so, you can select Event Booth as Product in the Booth Details tab.
In the Sponsorship field, you can enable the Create Sponsor option. By enabling the option a new user will be created as a sponsor.
You can add the Description about the Category. Then, click the Save button to save the new booth category.
Now, we can take a look at the configuration of booths in the Events module. The Booth opinion can be also obtained from the Configuration menu.Reporting
Reports menu in the Events module will help you to create a Useful Reports for all the events has been created in this module and attendees.
These reports play a vital role in knowing the impact/use/ of the event we have conducted.
It also helps the Event Manager to make right decisions in future.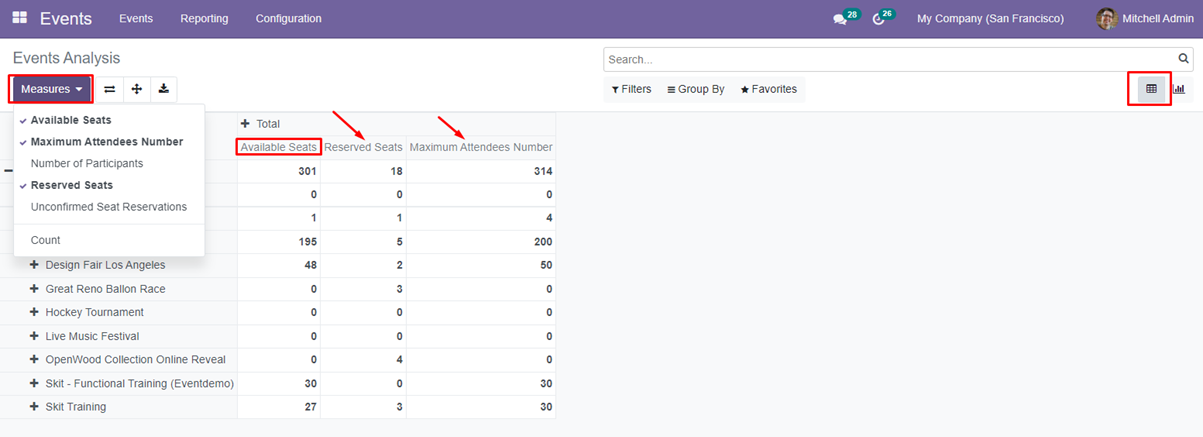
This is the Pivot table showing the details of the List of Events and in certain measures
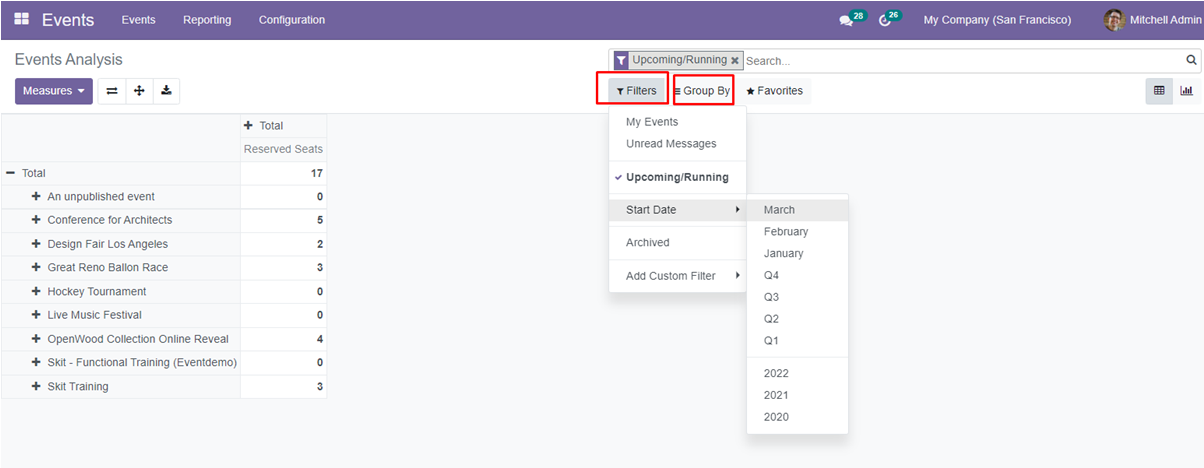
You can also see the reports using the “Filters” “Group by” option
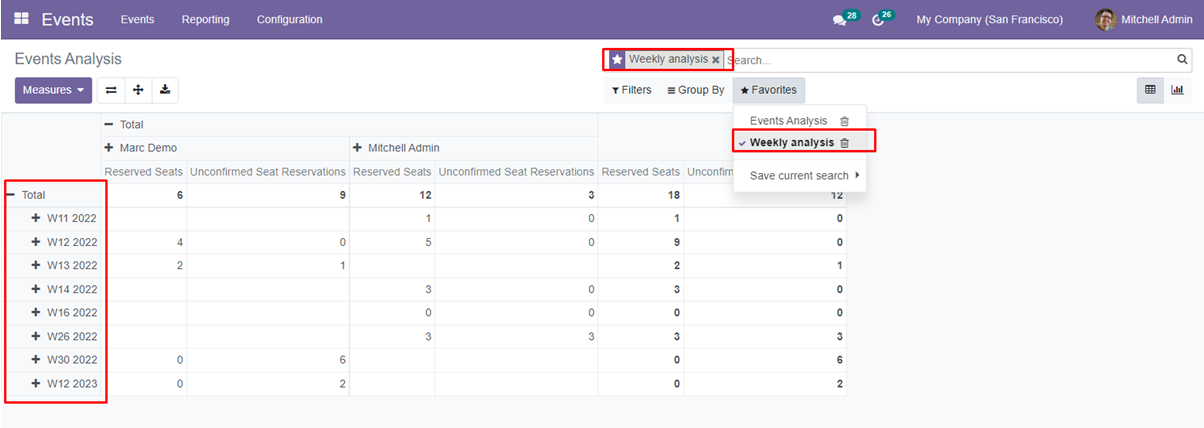
You can save the Search option for future use in the Favourites
This Event module is Perfect solution for conducting the Business/Management related activities and event in every Organization. You can use this Module for sure to plan the Event, Publish on your Website, sell online Tickets, Mange attendees and can do all the activities related to the event management.
We have Customized and Implemented the Event Management to one our Clients which gets the very good response from the Users!
We will also customize our software as per your requirements and provide you the BEST!
About Us:
Srikesh InfoTech India, that specialized in providing cost-effective ERP solutions and Offshore development for companies across the world since the year 2008. We have 15+ years of technical and functional experience in providing ultimate ERP customization and implementation support and services over 20+ countries. Our Odoo Addons were purchased by 75+Countries worldwide.
Connect With Us:
Skype : srikesh2008
Phone : +919600291839
Facebook : https://www.facebook.com/srikesh.info...
LinkedIn : https://www.linkedin.com/in/srikeshin...
Mail : info@srikeshinfotech.com